
RV repairs are often something that the ordinary RV owner can tackle.
There are numerous similarities between your stick-built home and your RV home on wheels. Both kitchen sinks have faucets, and both bathrooms most likely have a shower and toilet. So, if you’re confident enough to repair a kitchen faucet in your home, you can rest assured that it’s essentially the same procedure in your RV.
Unfortunately, due to weight or cost constraints and exposure to the weather, some RV components fail faster than those found in the average house.
How to Repair a Hole in the Interior Wall of Your RV
A hole in your RV wall can be repaired in ten minutes (for a simple patch) or hours of reconstructive work. In either case, it is doable with the right materials and tools.
To begin, clean the margins of the hole and remove any debris or fibers. If necessary, work some sandpaper into the hole and smooth the edges all the way around. You want your filler material to stick to strong edges rather than loose wood or fiberboard.
Remove any sanding dust and insert your filler material. Put more in than the hole can hold, so it bulges out a little. Flatten it using a scraper and let the filler dry.
Repairing a hole in the fiberglass.
When attempting to patch a small hole in fiberglass, a premium quality epoxy is the finest substance to use. This will ensure proper repair, prevent material shrinkage, and establish a watertight seal.
Repairing RV delamination.
You can use a delamination repair kit. These cost around $80-150 and include a high-strength bonding agent. The new bonding compound is marine-grade, so it will withstand prolonged exposure to water. It can re-seal the fiberglass to the RV’s underlying layers. Most kits also include syringes for filling hard-to-reach areas.
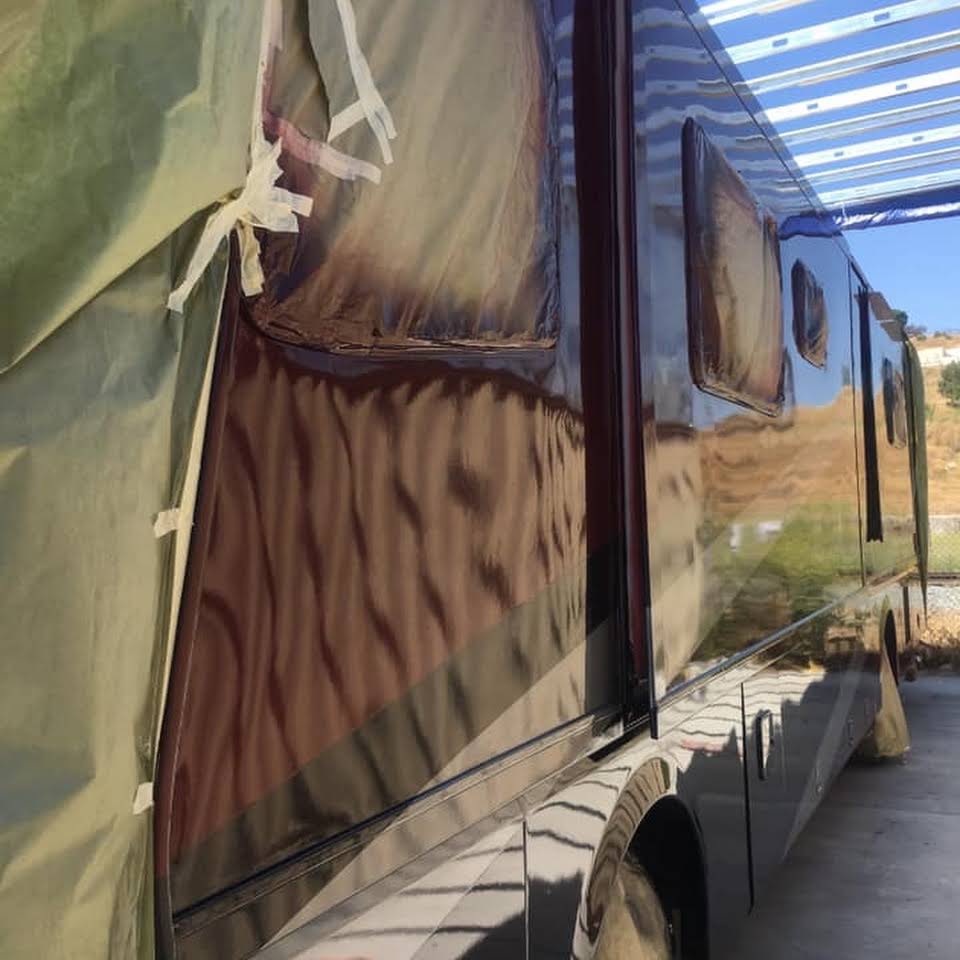
DIY Repairing Paint Job in an RV.
It is possible to paint the exterior of your RV without hiring a professional.
It may take trial and error to determine what works best, particularly when selecting which color to use. Certain paints are better suited to materials such as fiberglass or aluminum.
Keep in mind that decals cannot be painted over. You may either tape them over and paint around them, or you can simply remove them.
Fiberglass scratch repair in RV.
Clean the fiberglass with soapy water and a sponge to get a good look at the scratch.
Dip a rag into a container of petroleum jelly and rub the scrape in a circular motion. Repeat the treatment several times until you notice a notable difference in the appearance of the scratch.
If the petroleum jelly does not erase the scratch, apply a small amount of polishing compound to a soft cloth. Circularly rub the compound into the scratch. To check your progress, rub your finger over the scratch. Repeat this technique multiple times or until the scratch is gone.